Rule Of Thirds
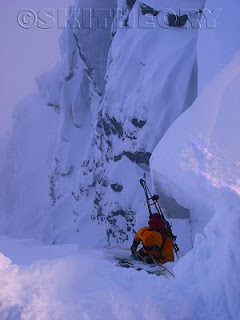
Lining up a shot can be one of the hardest things to actually concentrate on, but once mastered, is as natural and as easy as shooting the photo. One very important rule to follow is the "Rule Of Thirds". Imagine if you were to divide the photo into thirds vertically and horizontally. Along the 4 lines which seperate the "thirds" are going to be points of interest where your viewers eyes will naturally be drawn too. These intersecting lines are usefull spots to line up the focal point or subject of your photo. One thing to note, is that not all great photo's follow this rule to the letter, and experimenting is important to improving your style. (Photo Below: Matt Francis, Whirlwind Pk, BC - Backcountry Magazine Photo Annual 2007)
Light and Shadow
Photographers are always talking about light. Which is very important. But something which can be overlooked is how that light produces shadows, what aspect (North, West, East, South) you are shooting, and how it increases the depth of the photo. Using shadows are just as important as light, if not more important in my mind. Shadows highlight terrain, frame subjects, give mood, depth, and contrast to photos, and also can (if done properly) reveal hidden details. It becomes of even greater importance when shooting black and white.
For the best light conditions, shoot in the morning, or later afternoon. Light at these times is much softer, whereas you can get very strong harsh light in the middle of the day. In my experience, you can compensate by watching your positioning in relation to the slope aspect, and by not shooting into the sun. Days where there is an obvious layer of surface hoar present, you may capture a fantastic shimmering effect when the light hits it, while shooting in black and white as seen in the photo above.
When shooting on shady north facing aspect it can be hard to get the right amount of light on the subject, or also shoot towards the sun and have the subject "backlit." Your goal as a photographer is now to not only be in the right spot to line up the shot, but also be in the spot that captures the best light to give your photo contrast. A difficult obstacle, which sometimes cannot be overcome, especially while steep skiing. (Photo Below: Ty Petrusic skinning out to a hidden stash, early in the morning)
Exposure
Exposure is important and is pretty basic, but even seasoned veterans can even get caught with an under or over exposed photo now and then. It can be difficult when you are trying to move fast, or are in a hard line, or anything where setting up is really hard. But make sure that when you are chosing the right photo out of the hundreds you took that day, that it isn't too light or dark. The way a photo should look is easy on the eyes, and I don't just mean the expression, literally easy on the eyes. It should be inviting to look at and not cause you to squint, or look away. Getting it right, will illuminate every fine detail, and make the photo look unbelievable.
Most digital cameras have either an automatic setting, or will have a warning sensor, or preview. Use this to your advantage. Finding the right shutter speed, and aperture setting is hard sometimes, so shoot multiple photos while experimenting with them. In the digital world we live in, your camera literally is unlimited in the amount of photos it takes, use it because a manual shot will look much better when the light is controlled the way you want it to be.
Photoshop
Photoshop is a useful tool, but be careful to not use it as the means to a great photo. When a photo is over worked in photoshop it shows. Although sometimes that can be the desired effect as seen in the photo below. Use it to accent the already beautiful photo you just shot, not make the shot. (Photo Below: Matt Francis waiting to fly, Tatla Lake)
Improving color is one way to sharpen your image, especially if the color on your camera doesn't come out the way it should. The best way to do this is by using the Channel Mixer feature in photoshop, and by adjusting the various colors individually, as seen here. After adjusting the channels, playing with the exposure by duplicating your photo and blending them by either screen (lighten) or multiply (darken), will probably overdo it either way so reduce the opacity of the layer. Cropping after all the editing is done, is usually the best, as you may discover hidden details. All of this info on photoshop, I don't think I could even scratch the surface with, without starting a separate blog dedicated to just that. So find a tutorial site with some tutorials that have the effects and results you are looking for, and begin experimenting. If anything you will learn new features and gain a better understanding of how this complex program works.
Environmental Obstacles
When you've been around taking photos in the mountains for a long time, you know you're working around the weather, and not the other way around. But it doesn't have to ruin photographs as long as you know how to shoot in the conditions at hand.
Haze: Hazy days can easily wreck a large dramatic backdrop, and immediately render the image unusable, as the background will be washed out and the details will be hard to see. Days which are hazy, shoot micro terrain features or focus on specific terrain features watching that the depth of view keeps the hazy background blurred making the foreground "pop."
Overcast: Overcast days are typically flat light ski days, not only for skiers, but for photographs too. Shooting on these days, you should be careful, as all your photographs will turn out flat as well. I typically shoot in the trees where I can find a lot of color, but if up in the alpine, will switch over the black and white. Black and white photography on overcast days will help give the terrain more contrast and depth, and reveil it's features which the flat light hides. Try to find terrain that has as much contrast as possible; areas with lots of rocks, flutings, anything that will capture light and just as importantly shadow to give the photo depth. These days also do provide darker mooded photos, which, if that's what your going for is great.
Whiteout: Yeah, you can shoot, but its not going to be that great. Be in the trees, shoot portraits, and hope for a break in the weather.
Conclusion
Mountain photography, and capturing ski mountaineering images, is one of the biggest challenges for any photographer. You can shoot thousands of images a season and come out with just a handful of keepers. The best advice is shoot a lot, experiment, play with your manual settings, challenge yourself, and look through your new or old photos for what you think works and what doesn't. Other than that, keep it simple, you're in the mountains pretty much every shot is going to either look cool, or work as a great recon shot. Have fun out there.
Great Links
Vince Shuley's Photo Write Up on Taking The Shot on a ski shoot.
The God of light and shadow, possibly the best BW photos ever - Ansel Adams


Nice write up Al, good tips. What kind of camera gear do you shoot with or recomend?
ReplyDeleteI would really recommend a DSLR if you have the cash. The Canon Rebel series are pretty affordable and will take fantastic photos, plus you can start picking up different lenses for them. However, it is slightly heavier and bulkier than a point and shoot. So if thats a problem the G11 is a wicked compact camera, that's still light and compact.
ReplyDeleteI'd recommend the Panasonic Lumix LX3 or LX5 over the G11, as it is much smaller and lighter. The image quality is great for such a small camera, and it has a good f2.0 lens at 24mm, 16:9 aspect ratio, raw format, and all the manual controls. Great for landscape photographers, but not so good if you're into telephoto shots.
ReplyDeleteHello, thanks for posting this
ReplyDelete